Thursday, August 6, 2015

How to split big XML file into small files with certain number of items?

I have a huge xml file with over 2000 PO receipts. To make the data processing fast, I would like to split this big file into small xml files.

This is the structure of original xml file.


This is the split file I would like to have. This file is with same header information as the original one.


This is the code I wrote in Java.

 public class XmlSplit {  
   public static void main(String [] args) throws Exception {  
     File input = new File("input.xml");  
     DocumentBuilderFactory dbf = DocumentBuilderFactory.newInstance();  
     Document doc = dbf.newDocumentBuilder().parse(input);  
     XPath xpath = XPathFactory.newInstance().newXPath();  
     NodeList headernodes = (NodeList) xpath.evaluate("//PurchaseReceiptMessage/Header", doc, XPathConstants.NODESET);  
     NodeList nodes = (NodeList) xpath.evaluate("//PurchaseReceiptMessage/PurchaseReceipt", doc, XPathConstants.NODESET);  
     int itemsPerFile = 5;  
     int fileNumber = 0;  
     Document currentDoc = dbf.newDocumentBuilder().newDocument();  
     Node rootNode = currentDoc.createElement("PurchaseReceiptMessage");  
     for (int i=1; i <= headernodes.getLength(); i++) {  
     Node headerNode = currentDoc.importNode(headernodes.item(i-1), true);  
     rootNode.appendChild(headerNode);  
     }  
     File currentFile = new File(fileNumber+".xml");  
     for (int i=1; i <= nodes.getLength(); i++) {  
       Node imported = currentDoc.importNode(nodes.item(i-1), true);  
       rootNode.appendChild(imported);  
       if (i % itemsPerFile == 0) {  
         writeToFile(rootNode, currentFile);  
         rootNode = currentDoc.createElement("PurchaseReceiptMessage");  
         currentFile = new File((++fileNumber)+".xml");  
       }  
     }  
     writeToFile(rootNode, currentFile);  
   }  
   private static void writeToFile(Node node, File file) throws Exception {  
     Transformer transformer = TransformerFactory.newInstance().newTransformer();  
     transformer.transform(new DOMSource(node), new StreamResult(new FileWriter(file)));  
   }  
 }  


Monday, July 20, 2015

How to create a function in Jquery and added into an element? (jquery delegation)

I have a json data, and want to process it in Javascript and meanwhile generate a grid to append in  <form id="supplierFilter">.

The code is as following.

Javascript code:

 $(document).ready(function() {  
      var DTclass = ${class};  
      $.fn.classfunction = function() {  
            console.log("classes json:"+DTclass);  
          var columndiv;  
          var classes;  
          for (var i = 0; i < DTclass.length; i++) {  
               columndiv = $("<div class='col-sm-3'>");  
               classes = $("<div class='checkbox'>");  
               classes.append("<label> <input name='filter' value='"+DTclass[i].IMG_FILE_ID+"' type='checkbox'/>     <img src='${pageContext.request.contextPath}/download/"+DTclass[i].IMG_FILE_ID+"' alt='"+DTclass[i].DISPLAY_NAME+"' title='"+DTclass[i].DISPLAY_NAME+"'' /> "+DTclass[i].DISPLAY_NAME);  
               columndiv.append(classes);  
            $('#supplierFilter').append(columndiv);   
          }  
        };   
             $('#supplierFilter').classfunction();            
      )}    


HTML code:

 <form id="supplierFilter"></form>  


At beginning, I just use a regular javascript function, it did generate the html code, but when I clicked on the checkbox function, the function won't be triggered. This is caused by jquery delegation. There are more detail information from :
http://learn.jquery.com/events/event-delegation/

Wednesday, July 15, 2015

How to get last inserted id in DB2?

I have two tables in db2, one child, one parent. I would like to insert data into one table, and get the id (which auto generated in the db2,) then insert the id into another table as a foreign key by using ETL tool, Talend open studio.

After a long time research I found out a solution.
Within the same connection and same transaction use tDB2Input with this select:

 SELECT Identity_val_Local() as id FROM sysibm.sysdummy1  

The Talend job is like this:


Tuesday, July 14, 2015

How to create a dynamic bootstrap grid by using json data from a URL?


I want to display the above dynamic data by using bootstrap grid . The data is in Json format from a  server side URL. Json format data is as below.

 [{"DISPLAY_NAME":"Agreement Supplier","IMG_FILE_ID":138},  
  {"DISPLAY_NAME":"Subrecipient","IMG_FILE_ID" :102},  
  {"DISPLAY_NAME":"California Supplier","IMG_FILE_ID":103},  
  {"DISPLAY_NAME":"Certified Small Business Concern","IMG_FILE_ID":162},  
  {"DISPLAY_NAME":"HUBZone Small Business","IMG_FILE_ID":163},  
  {"DISPLAY_NAME":"Minority-Owned Business","IMG_FILE_ID":164},  
  {"DISPLAY_NAME":"Service-Disabled Veteran-Owned","IMG_FILE_ID" :165},  
  {"DISPLAY_NAME":"Small Business","IMG_FILE_ID":166},  
  {"DISPLAY_NAME":"Small Disadvantaged Business","IMG_FILE_ID":167},  
  {"DISPLAY_NAME":"Veteran-Owned Small Business","IMG_FILE_ID":168},  
  {"DISPLAY_NAME":"Women-Owned Small Business","IMG_FILE_ID":169},  
  {"DISPLAY_NAME":"AbilityOne","IMG_FILE_ID":139},  
  {"DISPLAY_NAME":"8(a)","IMG_FILE_ID":170},  
  {"DISPLAY_NAME":"Catering Supplier","IMG_FILE_ID":171},  
  {"DISPLAY_NAME":"Individual","IMG_FILE_ID":116}]   


I used jQuery to read data from URL and generate the HTML code. The code is as following.

 $(document).ready(function() {  
 // top classes selection  
      $.getJSON("${pageContext.request.contextPath}/download/${classesfileId}",  
             function (json) {  
               console.log(json);  
               var columndiv;  
               var classes;  
               for (var i = 0; i < json.length; i++) {  
                    columndiv = $("<div class='col-sm-3'>");  
                    classes = $("<div class='checkbox'>");  
                    classes.append("<label> <input name='filter' value='"+json[i].IMG_FILE_ID+"' type='checkbox'/><img src='${pageContext.request.contextPath}/download/"+json[i].IMG_FILE_ID+"' alt='"+json[i].DISPLAY_NAME+"' title='"+json[i].DISPLAY_NAME+"'' /> "+json[i].DISPLAY_NAME);  
                    columndiv.append(classes);  
                $('#supplierFilter').append(columndiv);   
               }  
             });  
 });  

In the HTML, I have code as this:

 <form id="supplierFilter">  
 </form>  


When it display in browser, the HTML is generated as this:

 <form id="supplierFilter">  
      <div class="col-sm-3">  
           <div class="checkbox">  
           <label>  
                <input type="checkbox" value="138" name="filter">  
                <img title="Agreement Supplier" alt="Agreement Supplier" src="/supsearch/download/138">  
                Agreement Supplier  
           </label>  
           </div>  
      </div>  
      <div class="col-sm-3">  
           <div class="checkbox">  
           <label>  
                <input type="checkbox" value="102" name="filter">  
                <img title="Subrecipient" alt="Subrecipient" src="/supsearch/download/102">  
                Subrecipient  
           </label>  
           </div>  
      </div>  
      <div class="col-sm-3">  
           <div class="checkbox">  
                <label>  
                <input type="checkbox" value="103" name="filter">  
                <img title="California Supplier" alt="California Supplier" src="/supsearch/download/103">  
                California Supplier  
                </label>  
           </div>  
      </div>  
      <div class="col-sm-3">  
           <div class="checkbox">  
                <label>  
                <input type="checkbox" value="162" name="filter">  
                <img title="Certified Small Business Concern" alt="Certified Small Business Concern" src="/supsearch/download/162">  
                Certified Small Business Concern  
                </label>  
           </div>  
      </div>  
      ......  
 </form>  


Wednesday, June 3, 2015

How to add leading zeroes in front of a number by using Java?

I have some integers. I would like to add leading zeroes if they are less than 100. For example, If the number is 1,  it would be converted to 001. If the number is 10, it would be as 010.

By using Java 7 and above, we can simply to do this by using the following line.

 int i =0;  
 int n=10;  
 System.out.println(String.format("%03d", i));  
 System.out.println(String.format("%03d", n));  


Wednesday, May 27, 2015

Select one unique record from DB table with the latest date

I have a file_store table like below.


I would like to select the latest records for each filetype_id.


The SQL to do this can be like this.

 SELECT f.file_id,f.FILETYPE_ID, f.file_obj_l,max_date  
 FROM FILE_STORE f inner JOIN   
 (SELECT FILETYPE_ID, max(f1.UPDATETS) as max_date FROM FILE_STORE f1  
 where FILETYPE_ID in (1, 2, 3)   
  group by FILETYPE_ID  
 ) a  
 on a.FILETYPE_ID = f.FILETYPE_ID and a.max_date = f.UPDATETS  


Tuesday, May 26, 2015

How to submit form with file upload field to Spring MVC controller?

Here is a very simple example on how to submit form with file upload field to Spring mvc.


1. Make sure you have org.apache.commons.fileupload.FileItemFactory in your library.
I have two blogs on how to add this jar into jboss environment.
http://jijli.blogspot.com/2015/04/jboss-module-dependency-error-caused-by.html
http://jijli.blogspot.com/2015/05/how-to-add-jar-in-maven-project-in.html

2. Add the following in Spring servlet-context.xml.

 <!-- Enable this for eventual integration of file upload functionality-->  
 <bean class="org.springframework.web.multipart.commons.CommonsMultipartResolver" id="multipartResolver">  
  <!-- setting maximum upload size -->  
  <property name="maxUploadSize" value="20000000"/>   
 </bean>  

3. HTML form.

 <html>  
 <head>  
 <title>Upload File Request Page</title>  
 </head>  
 <body>  
      <form method="POST" action="uploadFile" enctype="multipart/form-data">  
           File to upload: <input type="file" name="file"><br /> <br />  
           Name: <input type="text" name="name"><br /> <br />   
           <input type="submit" value="Upload"> Press here to upload the file!  
      </form>  
 </body>  
 </html>  


4. Spring MVC controller

 import java.io.BufferedOutputStream;  
 import java.io.File;  
 import java.io.FileOutputStream;  
 import org.slf4j.Logger;  
 import org.slf4j.LoggerFactory;  
 import org.springframework.stereotype.Controller;  
 import org.springframework.ui.ModelMap;  
 import org.springframework.web.bind.annotation.RequestMapping;  
 import org.springframework.web.bind.annotation.RequestMethod;  
 import org.springframework.web.bind.annotation.RequestParam;  
 import org.springframework.web.bind.annotation.ResponseBody;  
 import org.springframework.web.multipart.MultipartFile;  
 /**  
  * Handles requests for the application file upload requests  
  */  
 @Controller  
 public class FileUploadController {  
      private static final Logger logger = LoggerFactory  
                .getLogger(FileUploadController.class);  
      @RequestMapping(value = "/uploadFile", method = RequestMethod.GET )  
      public String uploadfile(ModelMap model)  
      {  
           return "upload";  
      }       
      /**  
       * Upload file using Spring Controller  
       */  
      @RequestMapping(value = "/uploadFile", method = RequestMethod.POST)  
      public @ResponseBody  
      String uploadFileHandler(@RequestParam("name") String name,  
                @RequestParam("file") MultipartFile file) {  
           if (!file.isEmpty()) {  
                try {  
                     byte[] bytes = file.getBytes();  
                     // Creating the directory to store file  
                     String rootPath = System.getProperty("catalina.home");  
                     File dir = new File(rootPath + File.separator + "tmpFiles");  
                     if (!dir.exists())  
                          dir.mkdirs();  
                     // Create the file on server  
                     File serverFile = new File(dir.getAbsolutePath()  
                               + File.separator + name);  
                     BufferedOutputStream stream = new BufferedOutputStream(  
                               new FileOutputStream(serverFile));  
                     stream.write(bytes);  
                     stream.close();  
                     logger.info("Server File Location="  
                               + serverFile.getAbsolutePath());  
                     return "You successfully uploaded file=" + name;  
                } catch (Exception e) {  
                     return "You failed to upload " + name + " => " + e.getMessage();  
                }  
           } else {  
                return "You failed to upload " + name  
                          + " because the file was empty.";  
           }  
      }  
 }  


Wednesday, May 20, 2015

How to test a web service with an attachment by using SoapUI?

"SoapUI is a free and open source cross-platform Functional Testing solution. With an easy-to-use graphical interface, and enterprise-class features, SoapUI allows you to easily and rapidly create and execute automated functional, regression, compliance, and load tests. " 

You can download it and more information from http://www.soapui.org/ .

Here is an example I am using it to test a web service with an attachment.

1. Create a SOAP Project.


2. Right click on the project- test, then choose Add WSDL.


3. Now I am going to send a request with an attachment to the service.
    Double click on Request1 on left side, then there is Request 1 window showing on the right side.
    Click on the Attachment.


4. Click on the button in red circle, then choose the file to attach.


5. Click the run button in red circle. Now you can see the result.


Tuesday, May 19, 2015

How to pass multiple checkbox (checked and unchecked) values to server side?

 In the W3C HTML 4, it has something like this:
Checkboxes (and radio buttons) are on/off switches that may be toggled by the user. A switch is "on" when the control element's checked attribute is set. When a form is submitted, only "on" checkbox controls can become successful.

This means the value is only sent if the checkbox is checked. So we need to have a way of remembering what checkboxes you are expecting on the server side since not all the data comes back from the form.


In my case, I have same checkbox names in different rows. The HTML code is like this.

 <c:forEach items="${classes}" var="class">  
      <tr>  
           <td  
                class="hidden-xs hidden-sm hidden-md hidden-lg ui-state-default">  
                <input type="hidden" id="classid" name="classid[]"  
                value='<c:out value="${class.configClassId}"/>'></input> <input  
                type="hidden" id="displayOrder" name="displayOrder[]"  
                class="form-control"  
                value='<c:out value="${class.displayOrder}"/>'></input>  
           </td>  
           <td><input type="text" id="internalClassName"  
                name="internalClassName[]" class="form-control"  
                placeholder="Class Internal Name"  
                value='<c:out value="${class.internalClassName}"/>'></td>  
           <td><input type="text" id="displayName"  
                name="displayName[]" class="form-control"  
                placeholder="Display Name"  
                value='<c:out value="${class.displayName}"/>' /></td>  
           <td>  
                <div class="checkbox">  
                     <c:if test="${class.enable!=null && class.enable=='Y'}">  
                          <input type="checkbox" name="enabled[]"  
                               class="form-control chk" value="Y" checked="checked">  
                     </c:if>  
                     <c:if test="${class.enable==null || class.enable!='Y'}">  
                          <input type="checkbox" name="enabled[]"  
                               class="form-control chk" value="Y">  
                          <input type="hidden" name="enabled[]" class="chk" value="N">  
                     </c:if>  
                </div>  
           </td>  
           <td><input type="text" id="searchWeight[]"  
                name="searchWeight[]" class="form-control"  
                value='<c:out value="${class.searchWeight}"/>'></td>  
           <td><input type="hidden" id="fileid" name="fileid[]"  
                class="form-control"  
                value='<c:out value="${class.fileStore.fileId}"/>'><img  
                src="${pageContext.request.contextPath}/download/${class.fileStore.fileId}"></td>  
           <td>  
                <div class="input-group">  
                     <span class="input-group-btn"> <span  
                          class="btn btn-default btn-file active">  
                               Browse&hellip; <input type="file" id="uploadimage"  
                               name="uploadimage[]" class="form-control" multiple />  
                     </span>  
                     </span> <input type="text" class="form-control" readonly>  
                </div>  
           </td>  
           <td><button type="button" class="removebutton"  
                     title="Remove this class">  
                     <span class="glyphicon glyphicon-remove "></span>  
                </button></td>  
      </tr>  
 </c:forEach>  


Since it only sends the checked values, I couldn't find out which checkbox value match to which row.
In order to work around this, you can see in the html code, I added hidden input to set a value if the value from server side is not 'Y'.  (See highlighted code above.)

For checkbox is changed after the page is loaded, I added some javascript code to set the right value in. The javascript code is as below.


  .on("click", ".chk",function() {  
    var v = $(this).attr('checked') == 'checked'?'Y':'N';  
    if (v=='Y')  
     {  
     $(this).removeAttr('checked');   
     $(this).after('<input type="hidden" name="enabled[]" value="N" />');  
     }  
    if (v=='N')  
     {  
          $(this).attr('checked');   
          $(this).val( "Y" );  
          if ($(this).next().attr('class')=='chk')  
               $(this).next().attr('disabled', true);       
     }  
 }  


There must be some other ways to do this. But the code above works fine for me. It sent checked and unchecked values correctly to the server side.


Thursday, May 14, 2015

More examples on Bootstrap form validator

In the previous blog, I have some examples on how to use bootstrap form validation. These days I did some more validation by using bootstrap validation.  Here are the examples.


I would like to have Display Name less then 20 characters, and Search Weight field only can put 1 or 9.

The following highlighted code showed how to add the new validation items in. I used stringLength and regexp validator.

Also you may see, when the mouse is over the red cross on the error field, the error message is showing on top of it. The code for this used 'tooltip'. See the highlighted code below.


 $('#classconfigform')  
           .formValidation(  
                     {  
                          framework : 'bootstrap',  
                          err : {  
                               container : 'tooltip'  
                          },  
                          row : {  
                               selector : 'td'  
                          },  
                          icon : {  
                               valid : 'glyphicon glyphicon-ok',  
                               invalid : 'glyphicon glyphicon-remove',  
                               validating : 'glyphicon glyphicon-refresh'  
                          },  
                          fields : {  
                               'internalClassName[]' : {  
                                    validators : {  
                                         notEmpty : {  
                                              message : 'Internal class name is required'  
                                         }  
                                    }  
                               },  
                               'displayName[]' : {  
                                    validators : {  
                                         notEmpty : {  
                                              message : 'Display name is required'  
                                         },  
                                         stringLength: {  
                                              max: 20,  
                                              message: 'The display name must be less than 20 characters long.'  
                                              }  
                                    }  
                               },  
                               'searchWeight[]' : {  
                                    validators : {  
                                         notEmpty : {  
                                              message : 'Search Weight is required'  
                                         },  
                                         regexp: {  
                                              regexp: '^[19]+$',  
                                              message: 'Only 1 and 9 can be chosen. 1 for class always on top.'  
                                              }  
                                    }  
                               },  
                               'uploadimage[]' : {  
                                    validators : {  
                                         callback : {  
                                              message : 'An image is required',  
                                              callback : function(  
                                                        value,  
                                                        validator,  
                                                        $field) {  
                                                   var $fileid = '';  
                                                   var $classimg = $field  
                                                             .closest('tr');  
                                                   // console.log("classimg:"+$classimg );  
                                                   $fileid = $classimg  
                                                             .find(  
                                                                       '#fileid')  
                                                             .val();  
                                                   //console.log("fileid:"+$fileid);  
                                                   //console.log("upload img value:"+value);  
                                                   if (($fileid == null || $fileid == '')  
                                                             && (value == null || value == ''))  
                                                        return false;  
                                                   else  
                                                        return true;  
                                              }  
                                         },  
                                    //end of callback  
                                    stringLength: {  
                                              max: 30,  
                                              message: 'The file name must be less than 30 characters long.'  
                                              }  
                                    }  
                               }  
                          }  
                     })  


Monday, May 11, 2015

JPA exception: org.hibernate.PersistentObjectException: detached entity passed to persist

When I saved a collection of form data into database by using JPA, I got "detached entity passed to persist" error.

I have a CompanyClass entity, and inside CompanyClass entity, I have a one to one relationship to Filestore entity.  See detail relationship of these two entities at JPA relationship between entities.

The save method I wrote in my service impl is like following:

     @PersistenceContext   
     private EntityManager emgr; 
     @Override  
     @Transactional  
      public void saveClass(CompanyClass cclass)  
                throws Exception {  
           emgr.persist(cclass);  
           emgr.close();  
      }  


But when I ran it, I got exception: org.hibernate.PersistentObjectException: detached entity passed to persist.

After research, I found out I shouldn't use

 emgr.persist(cclass);  

Instead, I should use

  emgr.merge(cclass);  


I found a blog about JPA: persisting vs. merging entites . It is clear about when we should use persist, and when we should use merge.

In my case, it falls into this:

You want to insert a new entity that may have a reference to another entity that may but may not be created yet (relationship must be marked MERGE). For example, inserting a new photo with a reference to either a new or a preexisting album.


Wednesday, May 6, 2015

How to make file upload style to look same in all browsers?

I have a file upload feature in my application. I found it looks different in all different browsers if I just use <input type='file'>.


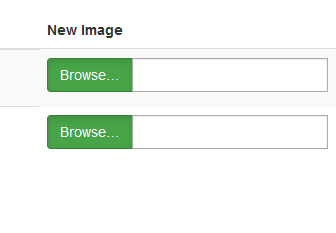
After some research, I found out a way to make it looks like a button with different styles by using Bootstrap.  It will display all the same in different browsers, and you can choose the right style that matches your design.


HTML code:

  <div class="input-group">                                                                                                           
            <span class="input-group-btn">                                                                                                       
                <span class="btn btn-success btn-file active">                                                                                             
                  Browse&hellip; <input type="file" id="uploadimage" name="uploadimage[]" class="form-control" multiple>                                                                 
                </span>                                                                                                                  
           </span>                                                                                                                   
   <input type="text" class="form-control" readonly>                                                                                              
 </div>                                                                                                                     

CSS:

 .btn-file {  
   position: relative;  
   overflow: hidden;  
 }  
 .btn-file input[type=file] {  
   position: absolute;  
   top: 0;  
   right: 0;  
   min-width: 100%;  
   min-height: 100%;  
   font-size: 100px;  
   text-align: right;  
   filter: alpha(opacity=0);  
   opacity: 0;  
   outline: none;  
   background: white;  
   cursor: inherit;  
   display: block;  
 }  
 input[readonly] {  
  background-color: white !important;  
  cursor: text !important;  
 }  


JS code:

 $(document).on('change', '.btn-file :file', function() {            
  var input = $(this),                             
    numFiles = input.get(0).files ? input.get(0).files.length : 1,      
    label = input.val().replace(/\\/g, '/').replace(/.*\//, '');       
  input.trigger('fileselect', [numFiles, label]);                
 });                                       
 $(document).ready( function() {                         
   $('.btn-file :file').on('fileselect', function(event, numFiles, label) {  
     var input = $(this).parents('.input-group').find(':text'),       
       log = numFiles > 1 ? numFiles + ' files selected' : label;     
     if( input.length ) {                          
       input.val(log);                           
     } else {                                
       if( log ) alert(log);                        
     }                                    
   });                                     
 });                                       


Friday, May 1, 2015

How to add a jar in Maven project in Jboss server?

In Jboss server, the repository is under {jboss root directory}\.m2\repository.

The configuration file is {jboss root directory}\.m2\setting.xml

There is a website called mvnrepository.com. It's a search engine for  jars, dependencies and repositories.

For example, I am searching for apache fileupload jar in mvnrepository.com. (See screenshot below.)


 I chose the latest version.


I copied the dependency, and put it into pom.xml.


In the pom.xml, the following lines are added.

  <dependency>  
           <groupId>commons-fileupload</groupId>  
           <artifactId>commons-fileupload</artifactId>  
           <version>1.3.1</version>  
           <scope>compile</scope>  
 </dependency>  

For the maven dependency scope, we can find detail information from here.


If this jar is not in your repository, you may download the jar and put it into your repository if you control it. Or you can right click download (jar) link to find out the repository from here, and add it into your setting.xml.

Note:
If the missing jar is a dependency from a module, then we have to add a new module instead. Reference previous blog.


Thursday, April 30, 2015

JBoss module dependency error - Caused by: java.lang.ClassNotFoundException: org.apache.commons.fileupload.FileItemFactory from [Module "org.springframework.spring:1.0.0" from local module loader

I am using file upload feature in Spring frame work. When I added the following line into web-context.xml ( or application-context.xml).

 <bean id="multipartResolver"   
 class="org.springframework.web.multipart.commons.CommonsMultipartResolver"/>  

And then I restarted the web server, I got the following error.

 Caused by: java.lang.ClassNotFoundException: org.apache.commons.fileupload.FileItemFactory from [Module "org.springframework.spring:1.0.0" from local module loader @582178a6 (finder: local module finder @7d78077d (roots: C:\act-jboss\jds\runtimes\jboss-eap\modules,C:\act-jboss\jds\runtimes\jboss-eap\modules\system\layers\base))]  
     at org.jboss.modules.ModuleClassLoader.findClass(ModuleClassLoader.java:197) [jboss-modules.jar:1.3.0.Final-redhat-2]  
     at org.jboss.modules.ConcurrentClassLoader.performLoadClassUnchecked(ConcurrentClassLoader.java:443) [jboss-modules.jar:1.3.0.Final-redhat-2]  
     at org.jboss.modules.ConcurrentClassLoader.performLoadClassChecked(ConcurrentClassLoader.java:431) [jboss-modules.jar:1.3.0.Final-redhat-2]  
     at org.jboss.modules.ConcurrentClassLoader.performLoadClass(ConcurrentClassLoader.java:373) [jboss-modules.jar:1.3.0.Final-redhat-2]  
     at org.jboss.modules.ConcurrentClassLoader.loadClass(ConcurrentClassLoader.java:118) [jboss-modules.jar:1.3.0.Final-redhat-2]  
     ... 29 more  

The reason of causing the issue is that my current org.springframework.spring doesn't have the dependence module which should include  org.apache.commons.fileupload.FileItemFactory.

In order to make it work, I create a new module called fileupload under apache/commons.
The structure is as below in my system.


The module.xml is as below.

 <?xml version="1.0" encoding="UTF-8"?>  
 <module xmlns="urn:jboss:module:1.1" name="org.apache.commons.fileupload">  
   <resources>  
     <resource-root path="commons-fileupload-1.3.1.jar"/>  
     <!-- Insert resources here -->  
   </resources>  
   <dependencies>       
        <module name="org.apache.commons.io"/>  
        <module name="javax.servlet.api"/>  
   </dependencies>  
 </module>  

Then, go to springframework, to add fileupload module in to module.xml.


  <module name="org.apache.commons.fileupload" />  
 </dependencies>  


Rebuild and restart the server, Now the error is gone.


Tuesday, April 28, 2015

Use bootstrap to display success or error messages

After "Submit" button is clicked, it is very common to display success or error message in the same page instead of refreshing the whole page. (See pictures below.)


After click "Save Classes" button, I have an ajax to post the form data to server side. If it success, a success message will be displayed at the bottom of the form. If ajax call failed, an error message will be displayed. I use BootStrap to display alter messages.

The javascript code for the ajax is as following:

      // Use Ajax to submit form data  
      $.ajax({  
                     url : $form.attr('action'),  
                     type : 'POST',  
                     data : $form.serializeObject(),  
                     success : function(result) {  
                          // ... Process the result ...  
                           $("#result").html('<a href="#" class="close" data-dismiss="alert">&times;</a><strong>Success!</strong> Your message has been sent successfully.');   
                       $("#result").addClass("alert alert-success");  
                     },  
                     error : function(xhr,textStatus,errorThrown) {                           
                           $("#result").html('<a href="#" class="close" data-dismiss="alert">&times;</a><strong>Error!</strong> A problem has been occurred while saving your classes.');   
               $("#result").addClass("alert alert-danger alert-error");  
                     }  
                });  


The following code needs to be added into html code.

 <div id = "result">     </div>  


There are some other bootstrap alert styles. You can find them here.


Wednesday, April 22, 2015

Using jQuery, Bootstrap and Form Validation in a UI development

jQuery:  "jQuery is a fast, small, and feature-rich JavaScript library. It makes things like HTML document traversal and manipulation, event handling, animation, and Ajax much simpler with an easy-to-use API that works across a multitude of browsers. With a combination of versatility and extensibility, jQuery has changed the way that millions of people write JavaScript. " (From https://jquery.com/)

Bootstrap: "Bootstrap is the most popular HTML, CSS, and JS framework for developing responsive, mobile first projects on the web. Bootstrap makes front-end web development faster and easier. It's made for folks of all skill levels, devices of all shapes, and projects of all sizes. Millions of amazing sites across the web are being built with Bootstrap." (From http://getbootstrap.com/)

FormValidation : "Best jQuery plugin to validate form fields."  (From http://formvalidation.io/ )

In one of my project, I am using jQuery, Bootstrap and a jQuery plug in to do the form validation.
For the detail of each one above, you can just click the links for detail.

I've used jQuery before, this is my first time to use Bootstrap and Form Validation. But this is a very good experience, it makes the UI development job easier and fun.

Below is the form I am building. In the previous blog, I introduced how to use jQuery to build drag and drop sorting table, and how to add a new row or remove a row.

Here, I use Bootstrap form validation to validate the form.


Features for this form:
1, Each row can be drag and drop to the any place. 
2. User can add a new row and remove an existing row.
3. Internal name, display name, Search weight columns are required for each row.
4. If there is a current image, the new image is not required.
5. If there is not a current image, the new image is required.

HTML code as below:

     <form id="classconfigform">  
     <button type="button" class="btn btn-default btn-xs" id="addbutton">Add New Class</button>  
         <table id="classtable" class="table table-striped">  
             <thead>  
                 <tr>  
                     <th class="hidden-xs hidden-sm hidden-md hidden-lg">Order</th>  
                     <th>Class Internal Name</th>  
                     <th>Display Name</th>  
                     <th>Enabled</th>  
                     <th>Search Weight</th>  
                     <th>Current Image</th>  
                     <th>New Image</th>  
                     <th>Delete class</th>  
                 </tr>  
             </thead>  
             <tbody id="sortable">  
                 <c:forEach items="${classes}" var="class">  
                     <tr>  
                         <td class="hidden-xs hidden-sm hidden-md hidden-lg ui-state-default">  
                             <input type="hidden" id="displayOrder" name="displayOrder[]" class="form-control" value='<c:out value="${class.displayOrder}"/>'></input>  
                         </td>  
                         <td><input type="text" id="internalClassName" name="internalClassName[]" class="form-control" placeholder="Class Internal Name" value='<c:out value="${class.internalClassName}"/>'></td>  
                         <td><input type="text" id="displayName" name="displayName[]" class="form-control" placeholder="Display Name" value='<c:out value="${class.displayName}"/>'></td>  
                         <td><input type="checkbox" name="enabled[]" class="form-control" checked ></td>  
                         <td><input type="text" id="searchWeight[]" name="searchWeight[]" class="form-control" value='<c:out value="${class.searchWeight}"/>'></td>  
                         <td><input type="hidden" id="fileid"     name="fileid[]" class="form-control" value='<c:out value="${class.fileStore.fileId}"/>'><img src="${pageContext.request.contextPath}/download/${class.fileStore.fileId}"></td>  
                         <td><input type="file" id="uploadimage"     name="uploadimage[]" class="form-control" value=''>  
                         </td>  
                         <td><button type="button" class="removebutton" title="Remove this class"><span class="glyphicon glyphicon-remove "></span></button> </td>  
                     </tr>  
                 </c:forEach>  
                  <!-- The new row template containing -->  
                 <tr class="hide" id="newClassRowTemplate">  
                         <td class="hidden-xs hidden-sm hidden-md hidden-lg ui-state-default">  
                             <input type="hidden" id="displayOrder" name="displayOrder[]" class="form-control" value='<c:out value="${class.displayOrder}"/>'>  
                         </td>  
                         <td><input type="text" id="internalClassName" name="internalClassName[]" class="form-control" placeholder="Class Internal Name"></td>  
                         <td><input type="text" id="displayName" name="displayName[]" class="form-control" placeholder="Display Name"></td>  
                         <td><input type="checkbox" name="enabled[]" class="form-control" checked ></td>  
                         <td><input type="text" id="searchWeight[]" name="searchWeight[]" class="form-control"></td>  
                         <td><input type="hidden" id="fileid"     name="fileid[]" class="form-control"/> </td>  
                         <td><input type="file" id="uploadimage"     name="uploadimage[]" class="form-control" value=''>  
                      </td>  
                         <td><button type="button" class="removebutton" title="Remove this class"><span class="glyphicon glyphicon-remove "></span></button> </td>  
                 </tr>   
             </tbody>  
         </table>  
     <button type="submit" id="saveClasses" class="btn btn-primary">Save Classes</button>  
     </form>  


Javascript code as below:

 <!-- jQuery (necessary for Bootstrap's JavaScript plugins) -->  
 <script src="${pageContext.request.contextPath}/resources/scripts/jquery.js"     type="text/javascript"></script>  
 <script src="${pageContext.request.contextPath}/resources/scripts/jquery-ui.min.js" type="text/javascript"></script>  
 <script    src="${pageContext.request.contextPath}/resources/scripts/bootstrap-3.3.2-dist/js/bootstrap.min.js"    type="text/javascript"></script>  
 <!-- FormValidation CSS file -->  
 <link rel="stylesheet" href="${pageContext.request.contextPath}/resources/scripts/formvalidation-0.6.2/dist/css/formValidation.min.css">  
 <!-- FormValidation plugin and the class supports validating Bootstrap form -->  
 <script src="${pageContext.request.contextPath}/resources/scripts/formvalidation-0.6.2/dist/js/formValidation.min.js"></script>  
 <script src="${pageContext.request.contextPath}/resources/scripts/formvalidation-0.6.2/dist/js/framework/bootstrap.min.js"></script>  
 <script>  
 $(document).ready(function() {  
         $("#sortable").sortable();  
          $('#classconfigform').formValidation({  
             framework: 'bootstrap',  
             err: {  
               container: 'tooltip'  
             },  
             row: {  
               selector: 'td'  
             },  
             icon: {  
               valid: 'glyphicon glyphicon-ok',  
               invalid: 'glyphicon glyphicon-remove',  
               validating: 'glyphicon glyphicon-refresh'  
             },  
             fields: {  
               'internalClassName[]': {  
                 validators: {  
                   notEmpty: {  
                     message: 'Internal class name is required'  
                   }  
                 }  
               },  
               'displayName[]': {  
                 validators: {  
                   notEmpty: {  
                     message: 'Display name is required'  
                   }  
                 }  
               },  
               'searchWeight[]': {  
                 validators: {  
                   notEmpty: {  
                     message: 'Search Weight is required'  
                   }  
                 }  
               },  
         'uploadimage[]': {  
               validators: {  
                                    callback: {  
                     message: 'An image is required',  
                     callback: function (value, validator, $field) {  
                     var $fileid='';  
                     var $classimg =  $field.closest('tr');  
                     $fileid = $classimg.find('#fileid').val();                                          
                     if (($fileid==null||$fileid=='')&&(value==null ||value==''))  
                            return false;  
                     else  
                             return true;      
                     }  
                     }//end of callback                                 
                                }  
                             }               
             }  
           })//end of validation  
 .on("click","#addbutton",function (){  
             var $template = $('#newClassRowTemplate'),  
                         $clone = $template  
                                      .clone()  
                                      .removeClass('hide')  
                                      .removeAttr('id')  
                                      .insertBefore($template)  
                                      .find('input')  
                                      .each(function(){  
                                      $('#classconfigform').formValidation('addField',$(this) );  
                                          });                         
         })  
 .on("click",".removebutton",function () {  
            if (confirm("Do you want to delete the class?")){  
                         var $removeclass =  $(this).closest('tr');  
         $removeclass.remove()  
                .find('input')  
                .each(function(){  
                     $('#classconfigform').formValidation('removeField',$(this) );                                                                       
                    });                  
            }  
     });  
 });  
 </script>  

Challenges in this development:
1. After add/remove  a new row, how to add/remove it from the validation?
There is a simple example (adding dynamic field) from form validation web site. But the form above is more complicated because this one has multiple rows, and each row has multiple fields.

2. Validation on the images.
 (If there is a current image, the new image is not required.
 If there is not a current image, the new image is required.)
This validation need to use a callback function.
The callback function examples can be found here. Since the form above has more rows, so it makes this callback more challenge.

Setup WSO2 ESB server and ActiveMQ server (Part 3) - WSO2 ESB and ActiveMQ connection


I've installed WSO2 and ActiveMQ in the past two blogs.
Setup WSO2 ESB server and ActiveMQ server (Part 1) - Installation
Setup WSO2 ESB server and ActiveMQ server (Part 2)

The WSO2 ESB server - Console URL is https://localhost:9443/carbon/admin/login.jsp
ActiveMQ server - Console URL is http://localhost:8161/admin/queues.jsp

The next we will verify the connection of WSO2 and ActiveMQ.
1. Create a new JMS proxy service. (The same way as in part 2)


2. Replace the source with the following xml doc.

 <?xml version="1.0" encoding="UTF-8"?>  
 <proxy xmlns="http://ws.apache.org/ns/synapse"  
     name="echoJmsProxy"  
     transports="https,http"  
     statistics="disable"  
     trace="disable"  
     startOnLoad="true">  
   <target>  
    <endpoint>  
      <address uri="jms:/EchoQueue?transport.jms.ConnectionFactoryJNDIName=QueueConnectionFactory&amp;  
      java.naming.factory.initial=org.apache.activemq.jndi.ActiveMQInitialContextFactory&amp;  
      java.naming.provider.url=tcp://localhost:61616"/>  
    </endpoint>  
   </target>  
   <publishWSDL uri="http://localhost:9763/services/echo?wsdl"/>  
   <parameter name="OUT_ONLY">true</parameter>  
   <parameter name="FORCE_SC_ACCEPTED">true</parameter>  
   <description/>  
 </proxy>  


3. Click Try this service.
Modify the attribute and click send.


4. Now login to ActiveMQ. We can see there is a message in the queue.


It verified the WSO2 ESB and ActiveMQ connected successfully.


Setup WSO2 ESB server and ActiveMQ server (Part 2)

We will create a simple proxy service to verify WSO2 ESB working fine.

From the part 1, the WSO2 ESB server has been installed in local machine, and we can get into it  through the URL:
The WSO2 ESB server - Console URL is  https://localhost:9443/carbon/admin/login.jsp

There is an echo service built in the wso2 ESB server. We will just add a simple proxy service to make sure it goes through.

    1) Go to WSO2 ESB console. Click on the left side Services - Add - Proxy Service.
On the middle of the window, choose Pass Through Proxy.


   2) Now you get into the page. Enter Proxy service name, and Target URL, then click Create button.


   3) Now you can see the service is in the deployed services list.
       Click source view link.


  4) In the source view window, we will use the follow xml document replace the default one. Then save it.

 <?xml version="1.0" encoding="UTF-8"?>  
 <proxy xmlns="http://ws.apache.org/ns/synapse"  
     name="echoProxy"  
     transports="https,http"  
     statistics="disable"  
     trace="disable"  
     startOnLoad="true">  
   <target>  
    <outSequence>  
      <send/>  
    </outSequence>  
    <endpoint>  
      <address uri="http://localhost:9763/services/echo"/>  
    </endpoint>  
   </target>  
   <publishWSDL uri="http://localhost:9763/services/echo?wsdl"/>  
   <description/>  
 </proxy>  


   5) Now click Try this service 


6) In the try echoProxy service window, we can change the attribute in the request window, then click send, in the response window, we can see the result.


If we get the return number as above, that means the simple proxy service is working in the wso2 esb server.