1. Create Composite Application project
WSO2 DevStudio allows you to package your artifacts into a Composite Application aRchive (CAR) and deploy it to WSO2 servers.
1) Click on Composite Application Project in Developer Studio Dashboard.
2) Enter composite project name.
3) Click finish button.
2. Add WSO2 ESB server in Developer Studio
We've installed WSO2 ESB server in my machine. Here we would like to add ESB server to Developer Studio. For detail on how to install WSO2 ESB server, please see my previous blog.
Setup WSO2 ESB server and ActiveMQ server (Part 1) - Installation
Setup WSO2 ESB server and ActiveMQ server (Part 2)
Setup WSO2 ESB server and ActiveMQ server (Part 3) - WSO2 ESB and ActiveMQ connection
1) Click on Add Server - Server in Developer Studio Dashboard.
2) Choose the server type.
3) Click Finish button.
4) Now you can see the WSO2 ESB server showing under servers tab.
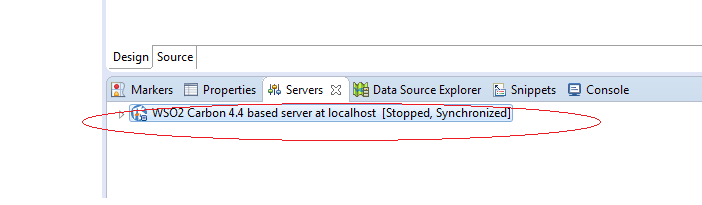
3. Run Composite application on ESB server.
1) Right click on the composite application name, and choose Export composite Application Project.
2) Enter export destination, then click next button.
3) Select artifact to include in the CAR file.
4) Right click on the composite application, and choose Run As , then Run on Server.
5) Choose the server
6) Click on Finish button.
7) Server is running now. We may go to WSO2 ESB server to check if the services created in the developer studio have been deployed to the ESB server.
Showing posts with label WSO2 developer studio. Show all posts
Monday, February 22, 2016
Thursday, February 18, 2016
Use WSO2 ESB Developer Studio to Create my first project (1) - Installation, Project Setup
1. Go to the following website to download the latest developer studio.
http://wso2.com/products/developer-studio/
2. Install developer studio in my local machine.
3. Click Eclipse I just installed and get into Eclipse.
5. Click Maven Multi Module project
6. Enter group id and artifact id, then click on finish button.
8. Choose new esb config project.
9. Enter ESB project name, click Finish.
10. Now I would like to create a new proxy service.
11. Choose create a new proxy service, click on next.
12. Enter the service name, click finish.
13. Now the proxy service xml file is generated and opened in the IDE as below.
http://wso2.com/products/developer-studio/
2. Install developer studio in my local machine.
3. Click Eclipse I just installed and get into Eclipse.
5. Click Maven Multi Module project
6. Enter group id and artifact id, then click on finish button.
9. Enter ESB project name, click Finish.
10. Now I would like to create a new proxy service.
11. Choose create a new proxy service, click on next.
12. Enter the service name, click finish.
13. Now the proxy service xml file is generated and opened in the IDE as below.
From here, we can drag Mediators or Endpoints from left side of palette to the design diagram.
Subscribe to:
Posts (Atom)


